Can We Apply PPF Only on Car Lights? A Step-by-Step DIY Guide
Car lights are an essential component of your vehicle, both
for safety and aesthetics. They not only illuminate the road ahead but also
enhance the overall look of your car. However, they are highly susceptible to
damage from road debris, UV rays, and environmental factors. This is where
Paint Protection Film (PPF) comes in. PPF is a thermoplastic urethane film that
provides an invisible layer of protection, keeping your headlights and tail lights
looking new for years.
This article provides a comprehensive, step-by-step DIY
guide on how to apply PPF only on car lights, covering both headlights and tail
lights.
Why Apply PPF on Car Lights?
Applying PPF on car lights offers numerous benefits. Firstly, it protects the plastic lenses from scratches, chips, and scuffs caused by small rocks, gravel, and other road debris. Secondly, it prevents the yellowing and hazing that often occurs due to prolonged sun exposure, preserving the clarity and brightness of your lights. This not only improves visibility at night but also maintains the resale value of your car. By doing a PPF car lights DIY, you can save money on professional installation while ensuring your lights are well-protected.
What You'll Need
Before you begin, gather all the necessary tools and
materials. Having everything ready will make the process smoother and more
efficient.
·
PPF Kit
for Car Lights: Most kits come pre-cut for specific car models. If not, you
can buy a universal sheet and cut it yourself.
·
Squeegee:
A soft-edged squeegee is crucial for smoothing the film and removing air
bubbles.
·
Slip
Solution: A mixture of water and a few drops of baby shampoo or a
specialized PPF application gel. This allows you to position the film
correctly.
·
Tack
Solution: A mixture of water and isopropyl alcohol (IPA) in a 70:30 ratio.
Use this sparingly on the edges to increase adhesion.
·
Microfiber
Cloths: Use these for cleaning and drying the lights without leaving lint.
·
Spray
Bottle: For applying the slip and tack solutions.
·
Heat Gun
or Hair Dryer: To make the film more pliable and help it conform to curved
surfaces.
·
Exacto
Knife or Razor Blade: Only if you need to trim the film.
·
Clay Bar:
For a deep clean, if needed.
Step-by-Step Guide: How to Apply PPF on Headlights and Tail Lights
Follow these steps carefully for a professional-looking
result. This guide covers the process for both headlights and tail lights, as
the method is largely the same.
Step 1: Thoroughly
Clean the Lights
This is the most critical step. Any dirt, dust, or debris
left on the surface will be trapped under the film, creating imperfections.
·
Wash the lights with soap and water to remove
surface dirt.
·
Use a clay bar to remove any embedded
contaminants like tar or industrial fallout.
·
Wipe down the lights with a clean microfiber
cloth and a gentle cleaner like isopropyl alcohol to remove any remaining oils
or residue.
·
Ensure the surface is completely dry and free of
any lint before proceeding.
Step 2: Prepare the
PPF Film
·
If you have a pre-cut kit, carefully peel the
film from its backing liner. Be gentle to avoid creasing or stretching the
film.
·
If you are using a universal sheet, place the
light on the film and trace its outline, leaving a small margin for trimming.
Cut the film carefully with a sharp blade.
Step 3: Apply the
Slip Solution
·
Generously spray the slip solution onto the
clean, dry surface of the headlight. This allows the film to slide and be
repositioned easily.
Step 4: Position and
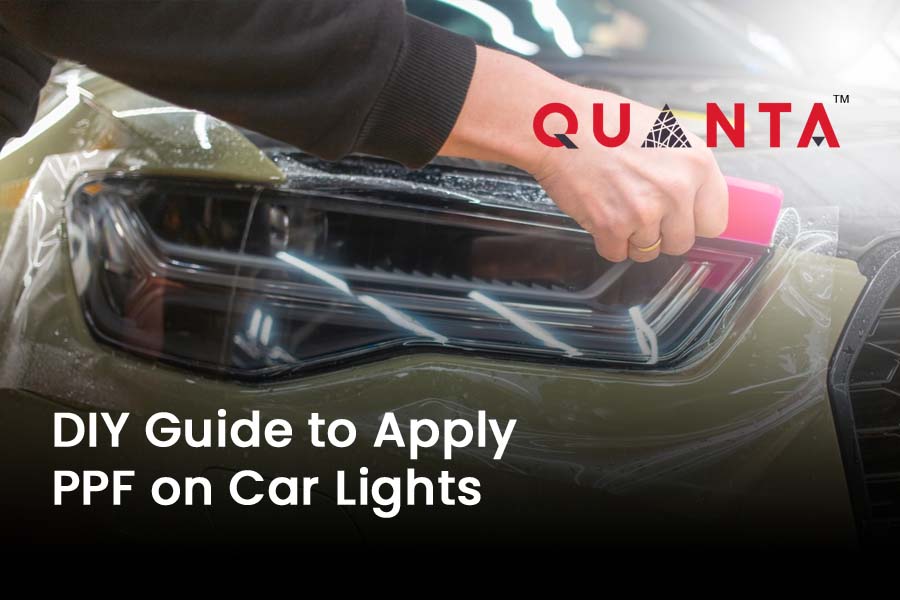
Squeegee the Film
·
With the light still wet with slip solution,
place the PPF film over it, sticky side down.
·
Gently slide the film until it is perfectly
aligned with the edges of the light.
·
Once positioned, begin the squeegee process.
Start from the center and work your way outwards, pushing the slip solution and
air bubbles out from under the film.
·
Use firm but not excessive pressure. Overlap
your squeegee strokes to ensure complete coverage.
· For curved areas, you may need to use a heat gun
or hair dryer to make the film more pliable. Heat the film gently and stretch
it slightly to conform to the curves. Be careful not to overheat it, as this
can damage the film.
Step 5: Trim and Tuck
the Edges (If Necessary)
·
If you used a universal sheet, carefully trim
any excess film with a sharp blade, leaving a small margin (around 1-2mm) to
wrap around the edges.
·
To secure the edges, use the tack solution.
Lightly spray the solution on a microfiber cloth and dab it on the edges. This
will help the film adhere firmly.
·
Use your fingers or the edge of the squeegee to
carefully tuck the film around the light's edges.
Step 6: Final
Inspection and Curing
·
Inspect the film for any remaining air bubbles
or water pockets. Small bubbles will usually disappear on their own over a few
days as the film cures.
· If you see any larger bubbles, gently lift a corner of the film (if possible) and re-squeegee the area.
· Allow the film to cure for at least 24-48 hours.
Avoid washing the car or exposing the lights to extreme conditions during this
period.
Applying PPF for headlights and tail lights is a rewarding
DIY project that significantly extends the life and appearance of your car's
lighting. While it may seem daunting, with the right tools, a clean workspace,
and patience, you can achieve professional-quality results. Remember, the key
to a successful application is meticulous surface preparation. By following
this DIY PPF car lights guide, you'll be able to protect your vehicle's most
vulnerable parts and maintain its value for years to come.